After reading another entry on Jonas' wonderful blog, Bonsai Tonight, I thought I'd share a little preparation of my own. I like this time of year to be spent getting soil ready, and also pots. Being that my pots consist mainly of growing pots, I thought I'd share how I get one of my growing pots ready.
First off, you have to buy the pot-terracotta in this case, 4.99 each. With these pots being as cheap as they are, there is always a downfall or two, and those are irrigation, and the ability to break when wind blows them off a shelf. As far as the wind goes, using bulb pots has worked well for me. In this case, a 10" bulb pot. As for the irrigation, that's a little more complicated. For that issue I need to drill some drainage holes.
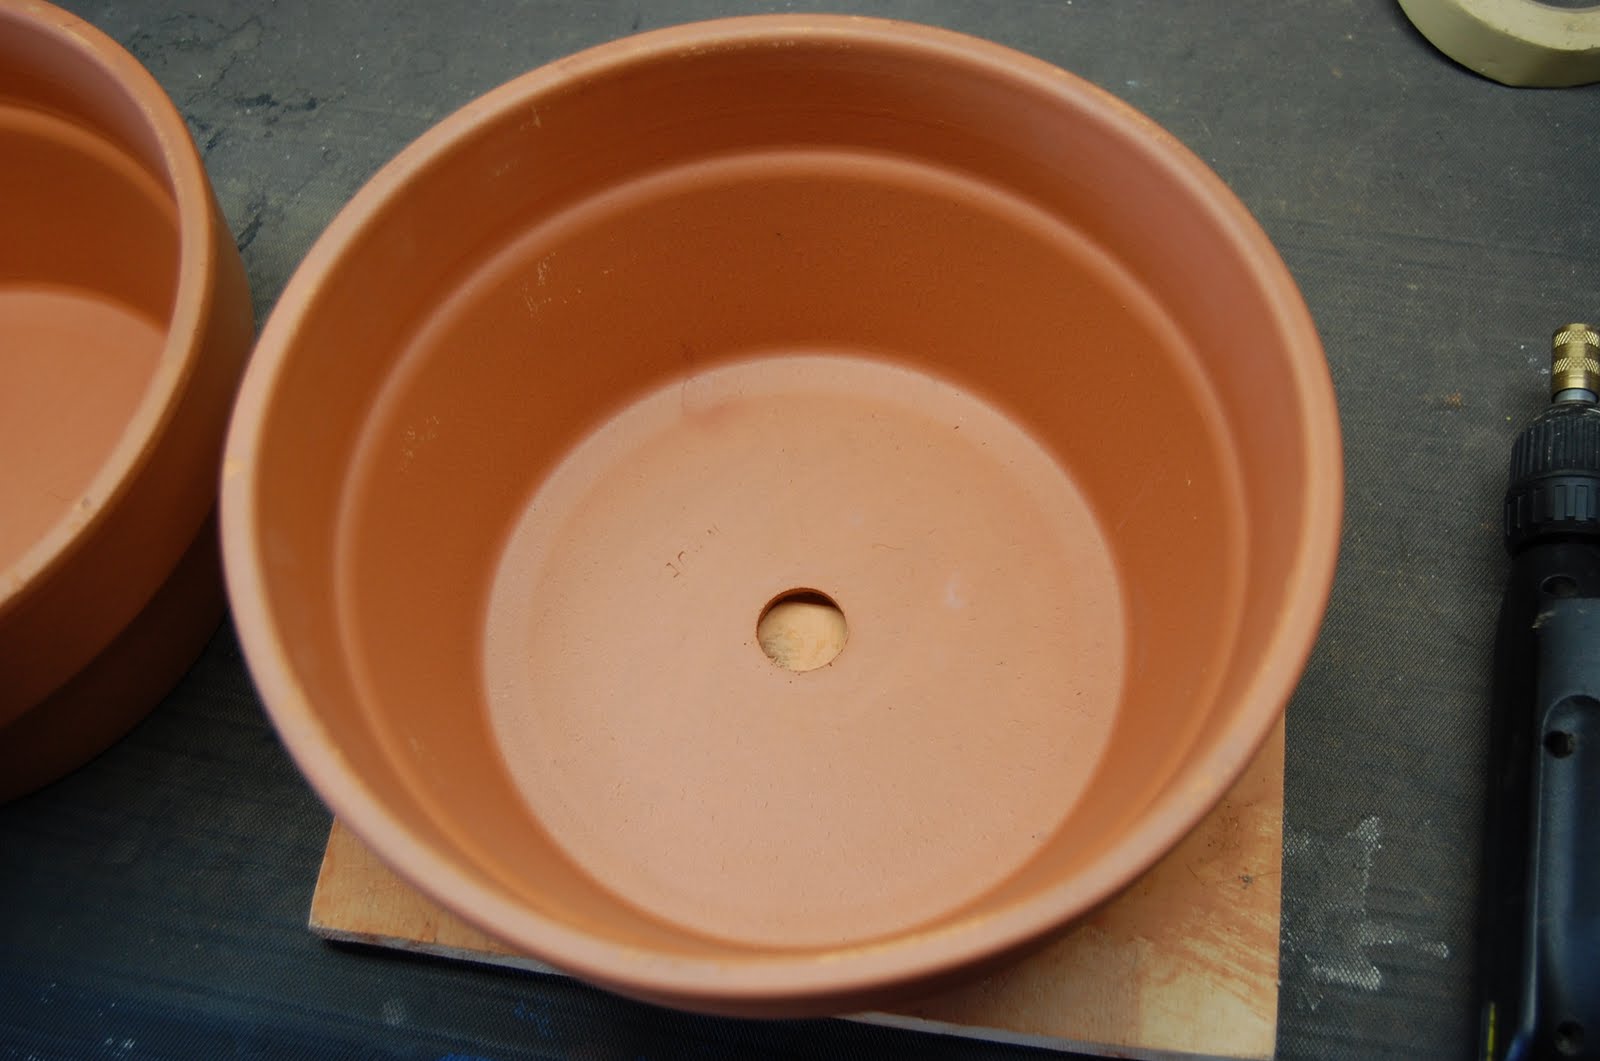
I use a 25 mm diamond tip drill bit, and get ready to add some holes, 4 in this case as it will make the tie down wires easier to insert-more about that later.

The most important thing when using a diamond tip bit is to keep the drilling area wet as you drill. As terracotta is pretty thirsty material, I spray it down pretty heavily before I start.
I then begin drilling, spraying water in the area as I go-can't see it in the picture, because I only have 2 hands, but 1 hand is drilling, the other spraying the water.

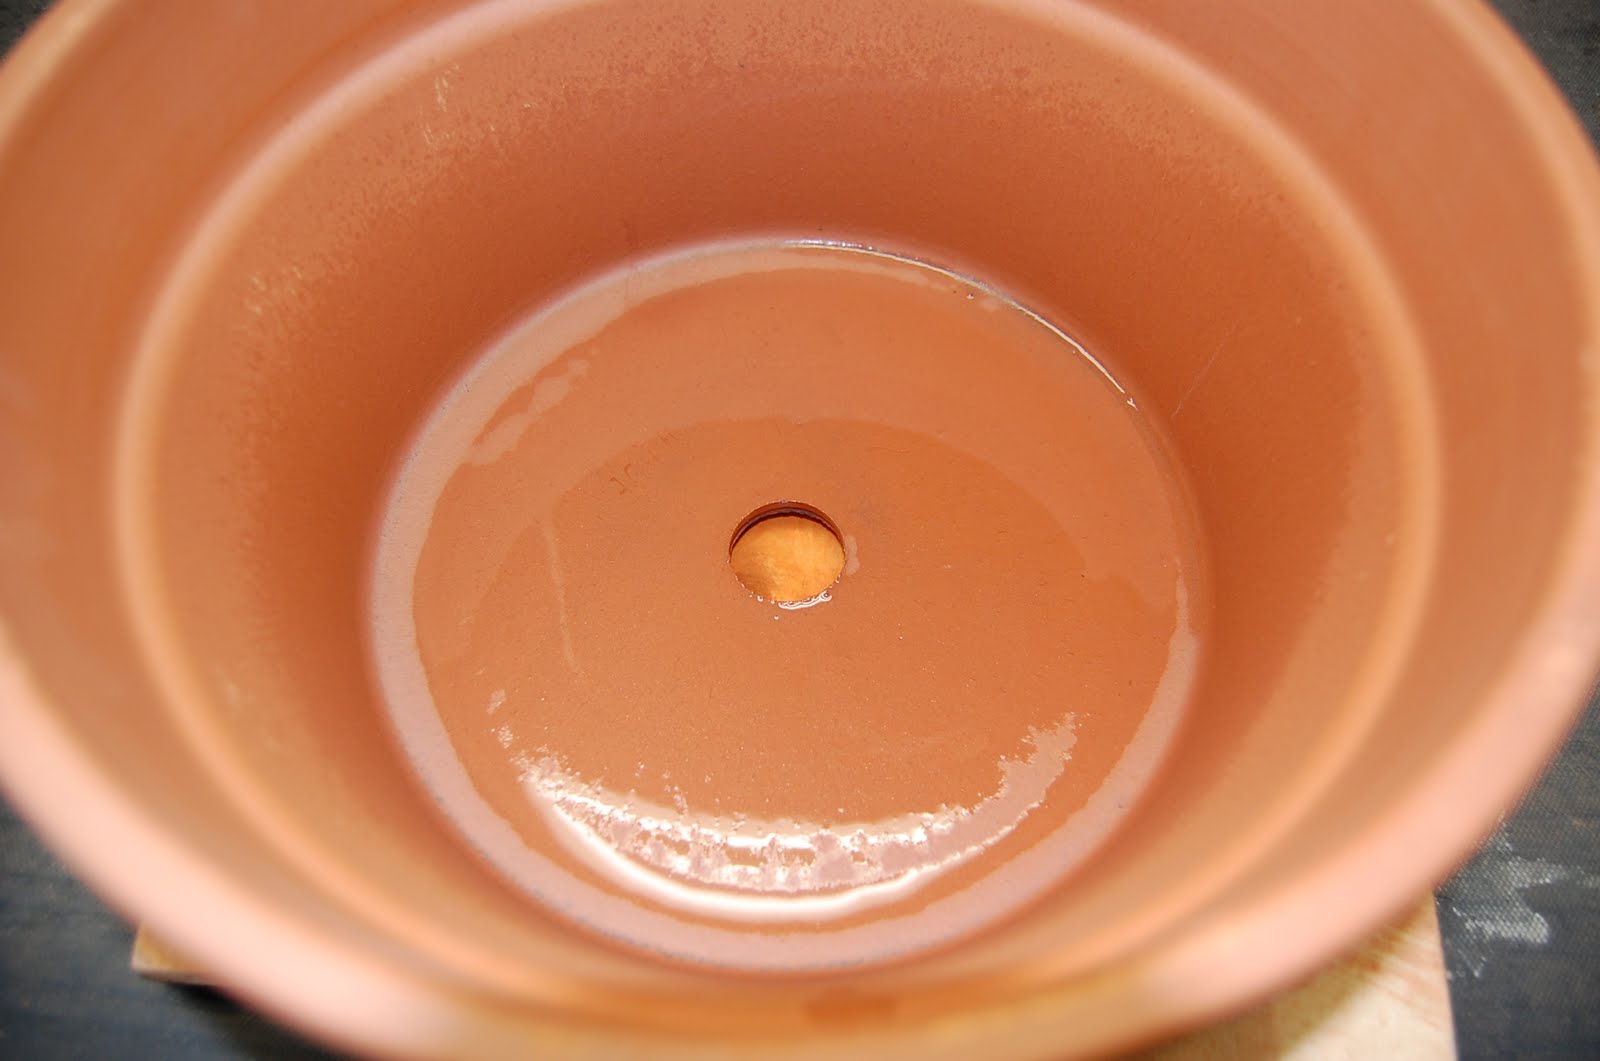
Once the drilling is done, you have a nice clean hole-now all you need to do is repeat the process 3 more times.

I use a 16 penny nail to go through the side of the drill bit to push out the terracotta plug.

Now it's time to do some drainage hole covering so the soil stays in the pot.

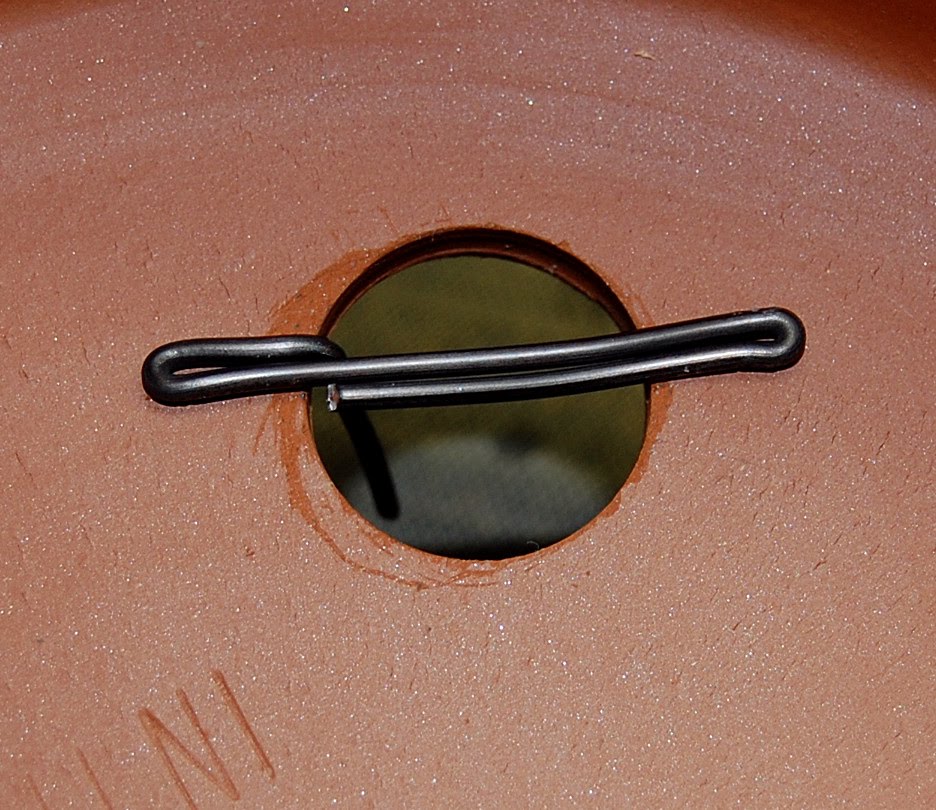
Making the tie downs is pretty simple-cut some 2mm wire into lengths long enough for your tie down (always err on the side of excess as you can trim it later after it's in)

Using your thumbs, make a "U" over the drainage hole that allows wire to hold down the drainage mesh on both sides of the hole. (again, picture would have both hands doing it, but 1 hand is holding the camera)

Now, with you left hand holding the "U" of wire, push it with your right hand and thumb towards your left hand making an "S".


Then, crimp both end with your pliers to create this....


Now bend one of the the outside wires down using your pliers allowing some of the wire to go over the edge of your drainage hole-it's important to use your pliers to make crisp sharp bends so that the mesh will be held in place firmly.

Then, put the wire into the hole, so you can see where to bend the other side down. Place your thumb over the spot and bend down with your pliers so your tie down looks like this.

Now double check that your tiedown is snug in the hole- if it isn't, re-bend the last bend to make it that way.

Just pass the tie down through the mesh, push it through the hole, and use your finger to push it against the pot and you're done. This is what it looks like when it's all done.

Now the pot is ready to transplant in the winter...one less thing to do.

2 comments:
Awesome post Scott - well done!
Thanks, Jonas! Just enjoy the hell out of reading your posts, and thought I might find someone out there that this might help.
Post a Comment